


KOLOR MANUAL
CURRENT PLUGIN VERSION: 1.0.092
updateS VIA the installer
MAIN INTERFACE

The Top, Mid and Bottom knobs allow you to shape the tone of your tracks.
Working like this is the exact opposite of your typical digital EQ workflow. As with vintage equalizers that inspired the plugin, it’s best to use your ears rather than numbers — move the knobs, and if you feel a particular band sounds great, move on!
The knobs’s display rounds to even dB values, the actual adjustment is made in 0.1 dB increments. The display is just for reference - as on all vintage hardware.
Hold the Alt / Option key while dragging the knobs to move them in finer increments. You can also use your mouse wheel / two-finger scroll for the same result.
Double-click the knobs to reset them to their default value.
NOT IN
MIKRO!
Clicking on labels underneath the big knobs brings you to module selection.
Kolor is a modular equalizer plugin. This means you can combine the characters and curves that made the original devices awesome, and create your own custom vintage equalizer. To do this, simply click on the label underneath any of the big knobs, and choose a different module from the list.
This feature is not included in Kolor Mikro.

Drive and Out knobs allow you to gain stage the plugin, and compensate for the level change introduced by the EQ.
The Drive knob pushes the signal harder into the preamp section. The level change is compensated for based on test recordings — implementing an algorithmic auto-gain mechanism would kill the natural dynamics of the preamps, tubes, and transformers, and I believe it’s a fair compromise to take.
Out is a clean output gain.
TIP: You can toggle which knob is visible by clicking on the little dots underneath the knob, or by holding SHIFT to temporarily show the other control.
NOT IN
MIKRO!

Preamp slider allows you to pick one of the preamp models.
This control gives you a wide range of tones and saturation characteristics — explore it along with the Drive knob! If you want to save some CPU for other tasks, or are after cleaner results, you can drag the slider all the way to the right to disable the preamp circuit altogether. And yes, Kolor sounds great clean, too!
In Kolor Mikro, you can only toggle the preamp on / off. There’s only one preamp model included in Mikro, and it’s the same model as the Belin preamp in Kolor.

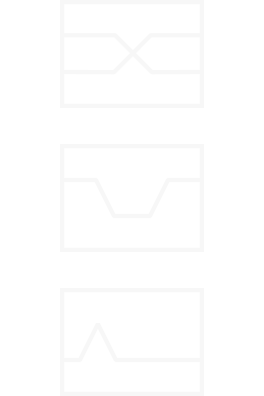
Filters allow you to carve space for other tracks, and inject extra character.
The filters in Kolor are not your clean, digital filters. They have a distinct character, which works wonders on many tracks. Combining low cut with a boost on the Bottom band will give you some stunning bass.
The resonance character can be changed on the + page. Follow this guide for more details.

Click on the + button at the top right to access extra parameters.
Kolor allows you to fine-tune the response of the plugin by tweaking some extra parameters. These are the equivalent of the ‘screwdriver’ or ‘advanced’ settings some plugins offer. Here, you’ll find options to dial in some noise and to tweak how the modules are routed internally.
Follow the guide below to learn what these controls do.
THE + PAGE
TO ACCESS THE PLUS PAGE, CLICK THE + BUTTON AT THE TOP RIGHT CORNER OF THE INTERFACE

Mix slider allows you to adjust the dry / wet balance between the processed and raw signal.
Use this where you need more subtlety, or just leave it wet — it sounds best this way. If you’re using Kolor as a saturator, adjusting this slider is a great way to keep the dirt under control.
Pre → EQ switch changes the routing between the equalizer section and the preamp.
By default, the EQ is inserted after the preamp. The reason behind this is that it’s more predictable this way — for example, boosting the lows with the Bottom band won’t also saturate the preamp. You can change this arrangement for a more authentic (and slightly wilder) response.

Ext bass switch extends the low end response of the preamps.
Vintage devices often don’t reach the lowest frequencies present in modern music. This switch (on by default) extends the response of the preamps so that they can reach lower. If you have disabled the preamp on the front panel, this switch will have no effect.

Ext filters switch makes the filters behave in a more consistent way.
In the real world, passive filters — such as the ones sampled for Kolor — will give you a different response depending on the impedance loading of the input source and the device they’re plugged into.
Kolor offers three resonance responses you can choose from: the first switch gives you the authentic, as-sampled resonance. The 2nd switch sets the resonance to a flat-ish response. The last one extends the resonance to match that of the Kinap model, which is the authentic ‘perfect-match’ filter behaviour. Experiment this to match the filter character to your source by taste.

Flip phase switch allows you to do what it says.
Some things just sound better with the polarity inverted. Don’t ask me why! I believe the most vocal engineer on the subject is Tchad Blake, so the phase switch is there if he’d like to use it. Of course, feel free to play with it, too.
Hiss, hum and gate hiss allow you to fine-tune the noise response of the plugin.
Adjust the overall noise level with the hiss slider. The hum switch adds what you’d expect it to add. If you enable the gate, the noise will be muted when no signal is present.
SOME OTHER THINGS

Click on the KOLOR text at the top left to save and load custom presets.
Kolor comes with some starting points to get you — well — started. You can also save your favorite module combinations and settings you frequently use for easy recall.

Drag the bottom right corner of the interface to resize the plugin window.
The settings will be saved, and all new instances of Kolor will load with the size you’ve set.
Need lower CPU use?
Disable the preamp to dramatically reduce the CPU consumption of Kolor.
When used this way, the plugin still gives you the incredible, super-smooth EQ you love so much with minimal processing strian.
DAW-SPECIFIC

Rendering in Reaper
Due to how Reaper handles plugin initialization during bounce, depending on your CPU, you may need to enable “Delay render start” and add 1 second before the start of the render, or turn on "2nd pass render" in your bounce settings to preserve the first few milliseconds of your track if your audio starts right at the beginning of the timeline.